Wednesday, April 10, 2013

Quilt Math

You may recall that I was on a quilt frenzy at the beginning of this year.  I found this pattern that I really liked, made one in a lap size and then made one that ended up being twin size.  They are off being quilted now, I think I will get them back next week and just have the binding left to do.

I decided that I wanted to use the pattern to make one for myself. I bought a variety of batik prints in a rainbow of colors.  But after I made the twin size I got to thinking about how many pieces it would take to make the queen size.

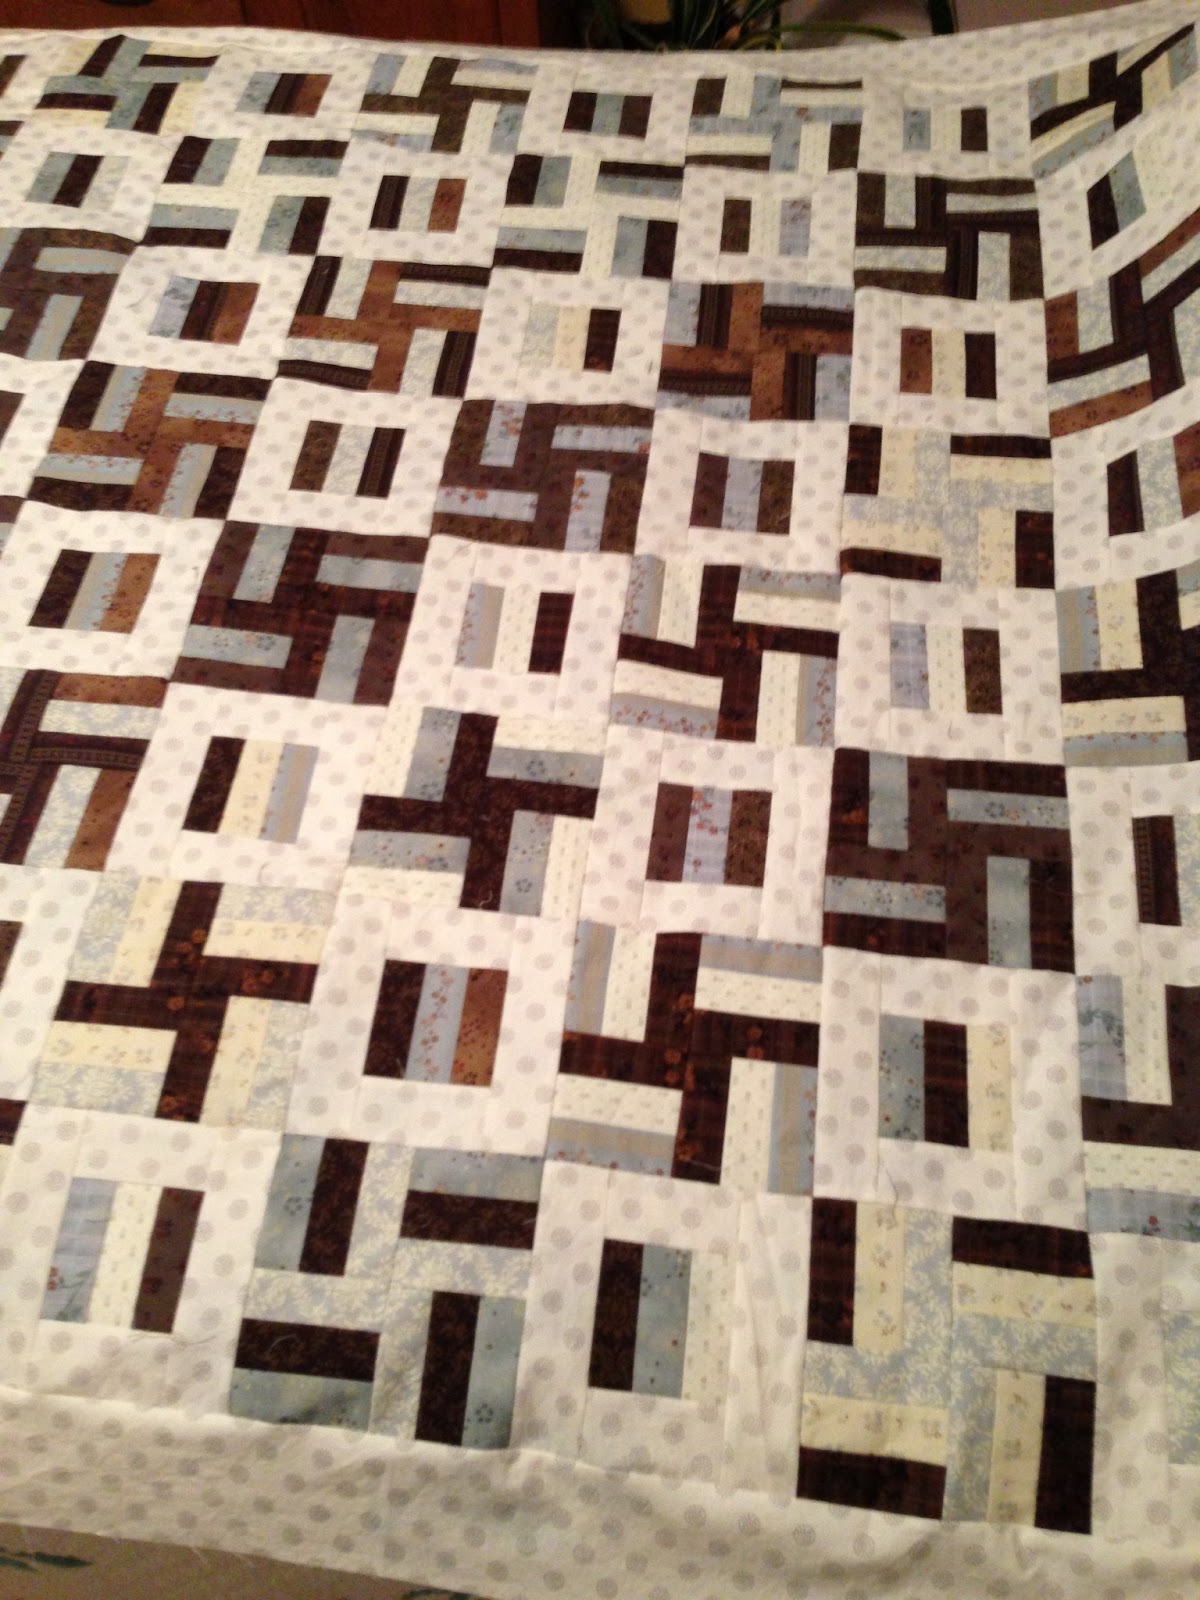
The pieces from the original pattern range from 1" x 3.5" as the smallest to 3.5" x 5" as the largest. a finished 'block' set measures 7" x 8.5" and then each one is joined with a 1" strip between. Each block consists of 9 pieces.

So to make a queen size I think I would need about 190 blocks, which is over 1700 pieces, not including all the sashing pieces to join them.  Sounds like a lot doesn't it?

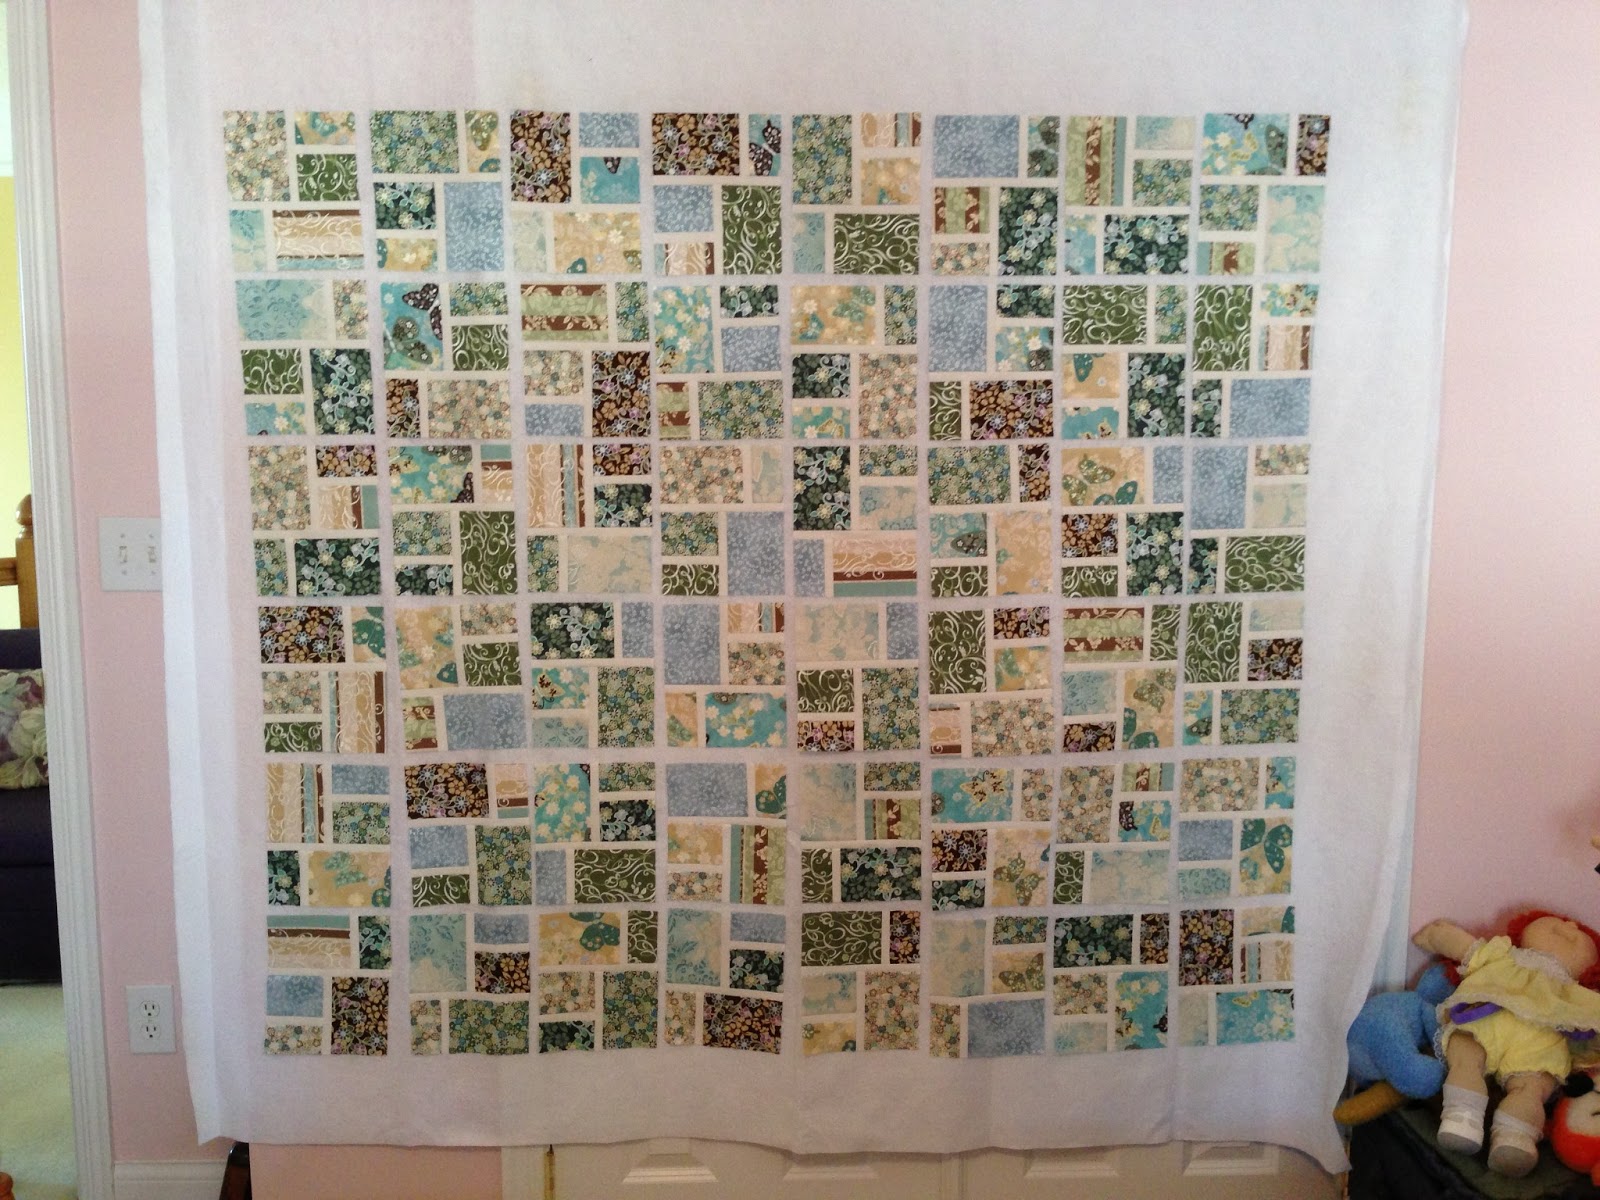
So I decided to do some quilt math and see if I could get it worked out so the pieces were larger (which would mean less of them).  Quilt math isn't always just a matter of multiplying.  I calculated if the blocks were 1.5 times and also 2 times larger.  2 times was pretty large, so I decided to try it with the 1.5 times.  My math was a little off in a couple of places, and to top it off, I cut all the pieces 1/4" wider than I meant to (I can't read my own writing, I guess).  Anyway, since it was an experiment, I adjusted where needed and here's the resulting quilt on the design wall (still have to do sashing and join them all).

 I'm still looking at the placement of the blocks to see if I need to move any around - I probably will.

With the size adjustments I made, each block ends up being about 11" x 13" and I did 1.5" sashing instead of 1".  So to make a queen size, I will need about 80 finished blocks - instead of 190 - which sounds a little more manageable.

I'm not sure I will decide for sure until I get this one put all the way together and toss it on a bed to see.

This one will end up close to 50" x 60" I think, depending on what I do for a border, if anything.  I was thinking about some geese - been a while since I've done any....

Stay tuned for the next quilt installment, although it may be a while!

Happy Sewing!
Susan

Wednesday, March 20, 2013

New Item? Insulated Lunch Tote

So a billion years ago (maybe just a few years ago), I told my husband that I would make him a new lunch tote.  He had one that he used all the time - it was pretty large, but it finally wore out.  I reclaimed the strap from it and stuck it in a drawer.

Sunday I decided it was time to finally make this.  So I had him tell me the measurements that he wants this new tote to be, and took a look at how the one he's currently using is constructed.  It's a pretty small little tote.

The dimensions he gave me were 10" wide, 7" deep and 6.5" tall.  He wanted a pocket on the front for his napkins and utensils.

The fabric he chose was this black and gray houndstooth - very manly!


Along with the strap that I reclaimed from the old lunch tote, I put a webbing handle across the top.

The zipper around the top and for the pocket are the larger pull ones - easier to get it open.    

Here you can also see the webbing pocket on the front

Webbing strap across the top.
 Shoulder strap attached to the side.
I used fusible fleece (heavier weight) with the exterior fabric.  Then I used a layer of PUL (water proof) and a layer of Insul-Bright to help keep the items cool (he also uses a freezer pack), and finally, I lined it with rip-stop nylon,

I wanted to make sure the base was sturdy, so before I put the lining in, I spray glued a piece of foam to the bottom.


He carried it to work for the first time yesterday and had lots of interest from his coworkers.  So hopefully I get some orders for these.

I can adjust the size as needed and can use fabrics of your selection.

Happy Sewing!

Susan

Friday, March 15, 2013

Faux Roman Shade Valance

I've been working on window treatments for another of my neighbors (this makes the third one).  She has a three window bay and a large double window in the eat in portion of her kitchen.  She has white horizontal blinds but was looking for something else - she had some very small triangle valances hanging, but they were really too small for the windows.

So I took her one of my window books and left with her for a couple of weeks.  She decided that she wanted a relaxed roman shade look - but just the faux valance - not a full functional shade.  So we measured the windows (and remeasured) and I told her how much fabric she would need.

She found a Colonial Williamsburg inspired print in red to use - it's really a lovely fabric, I think,

We decided that the shades would be board mounted - meaning the treatment is attached to a board rather than using a rod of any sort.

So my first task was to get the boards - because I had to cut for the return (sides of the board) and I needed to make sure I had the right measurements.

Here is a list of the supplies:

Boards - I used 1x3 by the required length ( I bought 3 - 3 foot and 1 - 6 ft)
Saw - or get them cut to the correct size at the hardware store (I love to get the saw going!)
Fabric
Lining Fabric
Matching Thread
Roman Shade Ring tape
Electric stapler

If I were making fully functional roman shades, I would use loose rings, but for a faux, I find the tape to be better.

One thing I don't like about making window treatments for other people is that I don't have a place to hang them to see how they will really look.  So I'm always worried until they are up at the customers house.

Here is a photo of the valance for the larger window - it has the gathering at the middle as well as the sides.  I think she's going to like them (and I hope her husband is able to put them up ok!)

On to the next project!

Happy Sewing,
Susan


Saturday, March 2, 2013

How is it March already?

In case you can't tell from my blog, I didn't have much ambition early this year.  I had a real case of the winter blahs - especially from about mid-February on.

So, the last post I did was on my quilts that I got back from the long arm quilting.  What's happened since then?

Well, I did a show in late January - Art Studio Clearance Sale - at the Lausche Building at the Ohio Expo Center (State Fairgrounds) in Columbus.  I did manage to clearance some old inventory, so that was a good thing.


I did some quilt piecing.   After I got the quilts back from the long arm, I decided I should make another.

I found this set partly started in the closet - I'm pretty sure I made a purse from some of this and there were some leftover pieces.  This one is lap size - about 55" square or so.


I found a pattern in a magazine that I thought I would like, picked a fat quarter bundle from my stash, and made one.   This one is also lap size - about 60 x 62 or so.


I did like the pattern, so much that I made a second one.  This one is twin size - it's so bright and colorful!


I also made a new valance for a friend of mine - she was redoing her dining room, among other things.  She has a large double window.  She liked the style that she had, but just wanted a new fabric to go with her new paint colors.

 And I did a lot of cat snuggling it seemed.


So really, it seems that perhaps I didn't completely have the blahs, I just didn't write about it here!

I'm working on some new things this weekend, so hopefully I can get back to writing on a more regular basis.

Happy Sewing!
Susan

Friday, January 11, 2013

I Can't Take Credit

My grandmother (we called her Nanny) hand pieced this around the world quilt top.  I'm not sure when she made it, but some of the fabrics in it look pretty old.

I took it to my friends at 3 Stitch Creations and they quilted it for me on their long arm.

I finished it with the binding.

It's beautiful!

Happy Sewing!

Susan

Sunday, January 6, 2013

It's a New Year!

I know that you know it - I just wanted to tell you again - you're welcome!

So today is the first Sunday in 2013 - and I have done very little sewing in this new year so far.  I've been talking about making a new purse for myself - I started outlining my requirements, measurements, etc., and then lost my 'umph', so to speak.

Today I did bind this pink, green and white lap sized quilt.  I took it to my friends over at 3 Stitch Creations and they did some quilting magic to it!

It's a lap size - 46 x 58 and it has a green with white polka dots backing and binding.

It will be for sale in my etsy shop once I get some good photos.  If you would be interested in purchasing it before I get it listed, contact me through my etsy shop or facebook page or catch me on twitter!

I have a second quilt to bind - it's an around the world pattern (about twin size, I think) that my grandmother hand pieced.  It was in some stuff of my mom's and I figured I should get it finished.  Maybe one of the nieces will want it someday.

I'm hoping for a busy sewing year, if there's anything you want me to custom make for you - just contact me!

Happy Sewing!

Susan